The latest title in Bandai Namco’s long-running series contains plenty of the classic Tales charm, but also introduces a number of new elements. The battle system is tweaked in many ways, and there are some key points that can slip under the radar among the various tutorial sections. Outside of battle, there are also numerous tips and tricks that will help you get through the adventure smoothly.
After successfully conquering the game and its plethora of content, here are our best Tales of Arise tips.

Tales of Arise tips for combat
Firstly, here are our top 14 combat-specific Tales of Arise tips.
Tinker your tactics
One of the first, and most important things you should do in Tales of Arise is visit the tactics section of the menu. In past Tales games, this was often a vague set of options where the most important thing was stopping your party members from wasting all of your items.
This time, you’re presented with a detailed selection that will drastically alter how your party will behave, including certain criteria for using specific items, or health thresholds where healers should start casting recovery artes.
One of the best things you can do is ensure your ranged fighters are programmed to keep their distance from enemies. This isn’t perfect, but works far better than other games in the series. Once you have spent a bit of time setting this up correctly there isn’t often a need to adapt it for specific battles, so you can rest assured that you won’t need to constantly revisit your choices.
Use Boost attacks to fill the Strike gauge
Boost attacks are crucial in a lot of ways, and the most obvious uses are clearly explained in the game – such as Rinwell interrupting artes and Law breaking down shields.
However, one of our most useful Tales of Arise tips for combat is to time the boost attacks in such a way that you keep the strike gauge charging. If there is a tough enemy on relatively high health but you’ve managed to get the diamond-shaped strike gauge over half, then you should use someone’s boost attack before you run out of steam. This will nudge it further to completion, replenish some AG and buy you a bit more time to complete a combo that earns the crucial one-hit kill.
Generally you are better off using the characters whose boost attacks are not required for a boost break. For instance, if there’s another charging enemy in the battle then don’t waste Kisara’s – use someone like Law or Dohalim, so you can still inflict the relevant Boost Break later on.

Keep enemies airborne
Keeping combos going has always been an integral part of the Tales battle system, and the separation of aerial-specific artes brings with it an opportunity to rack up some long combos.
If you inflict a ‘Break’ whilst on the ground, then enemies still often get a chance to recover mid-combo and hit back. This isn’t the case when you’ve launched them into the air, where it’s impossible for them to recoup and provide your best chance of landing a large flurry of hits.
Alphen has some great, multi-hitting artes that are good at knocking enemies into the air and keeping them there. Severing Wind, followed by combos like Luna Rondo, Stardust, Soaring Light Spear and Void Flash are all capable of keeping your foe up high. Artes that blast across like Hurricane Thrust are less reliable and therefore less useful. Once AG has been expended, you can call on a boost attack from someone like Shionne to replenish it and keep the combo going.
Not only does this deal significant damage, but it’s also another chance to fill the boost strike gauge.
Always try and end with a Boost Strike
Speaking of boost strikes, there’s an added benefit to go with the guaranteed kill. Boost strikes will usually deal some decent damage to the other enemies on the field, making it easier to take them down next.
The good news is that enemies become a lot easier to boost strike when their health is low. If an enemy’s health is in the red, try and string together quick combos that’ll rack up the hits without necessarily finishing them off first. Sword Rain: Alpha is a good choice, which doesn’t easily finish enemies but spamming it offers a quick burst that will likely earn you a boost strike.
These moves also have the added bonus of looking absolutely awesome, even if the same ones can get a little repetitive by the end of the game.
Defeat one enemy at a time
It’s common for battles to have multiple enemies on the screen, and the best approach is to pick one and stick with it – generally the weakest first and the strongest last (which usually simply comes down to raw size).
Once again, this comes back to boost strikes. If you take the enemies one at a time, and finish them all off with boost strikes (see above), then by the time you get around to the strongest enemy in battle, you’ve likely already whittled down their health a lot.
The longer the battle goes on with a full party of enemies, the more likely you’ll end up in trouble and start wasting CP. It’s definitely preferable to put all focus on one enemy at a time.

Pre-emptively use CP recovery items against bosses
CP recovery items are rare and expensive, so you should not use these liberally. However, when it comes to bosses and Gigant Zeugles then common sense should prevail. The last thing you want to do is look around and realise half of your party is KO’d because you lost track of CP and didn’t notice it was all expended. Shionne often gives a hint of this, but in frantic and chaotic battles it can be easy to miss.
For example, if you see that your CP is down to a quarter but the boss is still over half health, then it’s pretty obvious you are going to need an Orange Gel at some point. It’s best to use this sooner rather than later, especially as bosses tend to power up as their health lowers, leaving you less leeway to toss items and cast healing artes during emergencies. This approach also makes it easier to use your less potent items first, potentially saving more of your best items in the long run.
I’ll reiterate – only do this against bosses, since CP items are usually in short supply.
Check all enemy weaknesses for free
Tales of Arise is pretty generous elsewhere, as it allows you to scan enemy traits and weaknesses without the need for an item or an arte.
Simply hold L1 (the targeting button) which will freeze time and let you cycle through the enemies on the battlefield. This will provide you with their element, along with an icon that denotes what sort of behaviour they exhibit. For instance, a small armour icon indicates Law’s boost strike will be needed, whilst a curled upwards arrow suggests speed and would require Dohalim.
Note: Some enemies do not have an element, and do not have such boost attack weaknesses. You’ll know this is the case if there is nothing next to them.
Whatever element you see on an enemy, simply hit them with the opposing one. The opposing elements are:
- Fire vs Water
- Earth vs Wind
- Light vs Dark
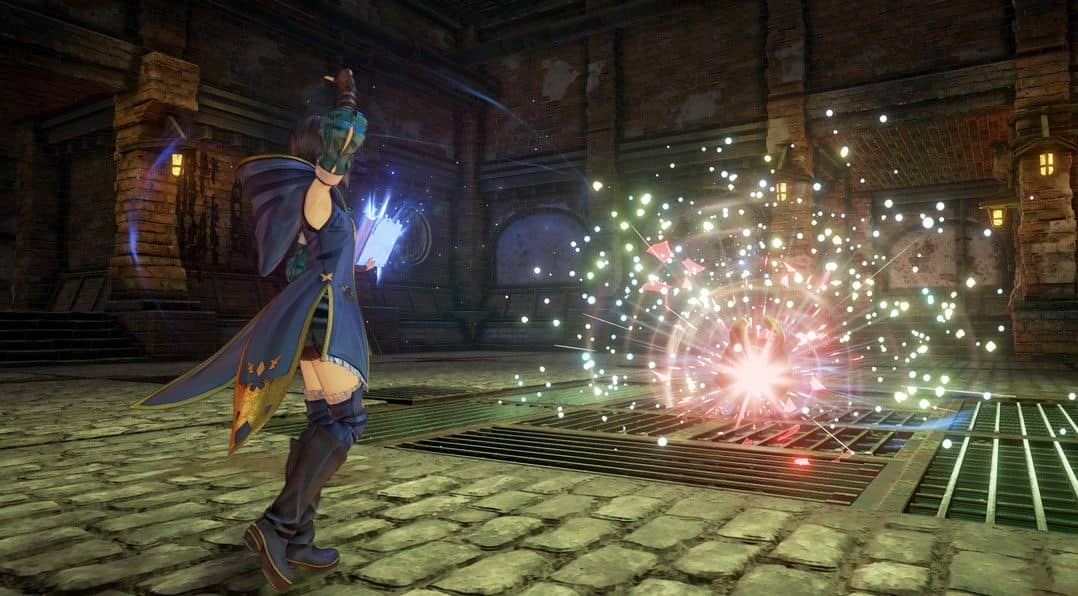
Disable artes for bosses
A good old-fashioned tip for the Tales series is around disabling artes for specific fights. The AI in Tales of Arise is generally pretty good, but they still have a tendency to pick the wrong arte choices. Rinwell in particular likes to use the wrong artes, and even selects the ones the boss can resist sometimes.
There’s a way around this. After checking their weakness with L1, open the menu, access the artes screen and manually disable all artes that you don’t want to use. By leaving only the ones that hit the weakness, it’s a sure-fire way of doing more damage.
Just remember to revisit the menu after the battle is concluded and activate them again.
Manually target with other party members
Another slight issue with the AI is that you cannot instruct your party members to target the same enemy as the character being controlled by the player. This is a strange omission given the amount of detail covered elsewhere in the tactics screen, but rest assured there is a resolution to this as well.
Once you hold down L1 and freeze the battle, you can do two things – change your targeted enemy with the analogue sticks, or change your controlled character with the D-pad. The character being controlled is denoted by a little red flag over their picture. I can’t be the only one who changed their character over by accident and failed to realise how I did it!
You should hold L1, use the D-pad to change characters, then use the analogue stick to change the enemy targeted by that character. Then switch to the next character with the D-pad and repeat until everyone is attacking the same enemy. Switch back to your original character and let loose. This will help you take enemies out one at a time, and finish them off with boost strikes as per the above tips. It’s not necessary in every battle, but certainly comes in use during tougher encounters.

Plan ahead to pick the best Boost Strike
One of our more difficult Tales of Arise tips to actually execute is to try and plan which boost strike will be used. This is worth doing as these generally inflict elemental damage which can hit enemy weaknesses, but can be tricky to pull off in the heat of the moment as you only have limited time to press a directional button.
Therefore it’s best to make your decision before the strike prompt appears, so you are ready to call on the right character. This isn’t an exact science because you still can’t actually choose who the character teams up with, but you can give yourself a 50/50 chance of hitting the right elemental weakness.
Remember: don’t pick the elemental weakness that corresponds to the enemy you are defeating, because you are going to kill them either way. Pick the one according to the weaknesses of the other enemies to be taken on next.
Save Alphen’s Boost attack to interrupt
Alphen’s boost attack is one of the more basic ones, but it’s definitely the most useful. This is essentially a guaranteed Boost Break, downing the enemy and opening up a temporary window to deal significant damage or recuperate.
The best time to use this, of course, is when an enemy is charging up a deadly attack. One of your other party members will often shout a warning about these, and against bosses it’s an invaluable tool that can turn the tide of the battle. Just beware that when a boss starts flashing blue, they are immune to Boost Breaks. This usually occurs once you’ve depleted half of their health, and is the best time to keep your distance until they revert to normal.
In normal battles against multiple foes, it’s also a great idea to try and lure them all towards you and hit them with the same attack, Boost Breaking all of them at once.

Always go for the core – and remember it heals
Zeugle bosses and Gigant Zeugles virtually all have a core, denoted by a shiny orange crystal somewhere on their body (pictured above). This could be in their chest, their leg, their tail, or somewhere else entirely.
If you attack the core enough you’ll inflict a core break, temporarily disabling them and granting a valuable opportunity to pummel them with your strongest attacks. Frankly, this period of vulnerability doesn’t last that long, but we’ll take what we can get.
The important thing is to specifically target it with L1, as it is classed as a separate target to the main body of the boss. The HP of the core is shared with the overall boss health, so there’s no downside to targeting it.
The best part of this is that the core regenerates over time, meaning you can sometimes get two or even three core breaks during the same battle. Just be mindful that the target will automatically switch back to the boss’s main body after the first core break, so use L1 again immediately after you notice that the core has returned.
Heal Alphen whilst he is using the Blazing Sword
Alphen’s Flaming Edge perk is quite literally a double-edged sword – powerful damage at the expense of health. There are a couple of healing artes that are particularly useful alongside this – Shionne’s Healing Circle and Dohalim’s Regenerate. I’ve never been a huge fan of lagged healing, but it really comes into its own when Alphen wields the blazing sword.
Simply expending your health and waiting for a healing arte leaves a brief moment of vulnerability, so it’s advised to use Blazing Edge as soon as you see these artes being cast, or better still – cast them manually just before you wish to use it.
If you can literally be in the process of healing Alphen during his use of the Blazing Sword, then it greatly reduces your risk and gets Alphen back in business. Otherwise – retreat and spam Double Demon Fang from range whilst waiting on Shionne.

Control characters manually if you want to use their Master Artes (Advanced)
If you were wondering about the benefits of those cosy campfire conversions, this is actually the way to unlock secondary mystic artes, known as the Master Artes (a full guide to this is here).
These can only be unlocked late in the game, and come with that catch that a combo of five hits with different artes must be used before unleashing it.
Now, the AI is good at pulling off mystic artes in general, but they are hopeless at activating the Master Artes. If you want to actually reap the rewards of these all-powerful attacks, then your best bet is to manually switch characters when you see them enter overlimit state. It’s not particularly hard to use a Master Arte manually, since one of overlimit’s benefits is to prevent arte interruption. String a few together, activate a mystic arte as normal and enjoy the awesome cinematics.
General Tales of Arise tips
Outside of combat, there is still plenty of handy information that will assist you. Here are 6 additional Tales of Arise tips with some further advice.
Keep checking the fast-travel map for new quests
The fast-travel function comes with a useful bonus, namely that it will denote the locations where quests are available.
Get into the habit of opening the map regularly and scrolling through each region, since quests can often pop up out of the blue in previous locations. A letter icon will display in any place where a new quest is available, and you’ll be able to view the specific map in question to see exactly where it is.
Every time you complete a major story milestone, or even a sidequest, you should check in for new opportunities. Sometimes completing one sidequest will prompt another to appear elsewhere (or from the very same person again).

Accept every single quest
On the topic of sidequests, you should accept every single one as soon as you find it. Note that I am not necessarily saying you have to clear them all immediately, as many can be tedious, but if you are exploring anywhere near as much as me, you’ll be surprised how many you can complete instantly. Often, the required items were already in my possession.
There’s also a pretty good chance you’ll complete some other quests whilst simply going about your business. Gald and SP can be pretty hard to come by at certain points, so any easy rewards can go a long way. The handy fast-travel function can usually zip you right back to the client to recoup your spoils within seconds.
Complete titles one at a time
Completion of each title results in a specific stat boost, which add up to some hefty improvements for your characters. These generally follow the particular stats that each character relies upon, making them all the more important.
When several titles are available, it’s therefore worth looking at the whole range of skills and going for the title with the best selection. Start filling it out and don’t stray elsewhere until it’s finished.
On the other hand, you should of course unlock as many titles as you can, even if you won’t get around to learning the skills for a while. This is because the first skill of each title comes free of charge. When there’s an empty ring on the skill screen, move the cursor into it and it will give a hint of what is required to unlock it. Just bear in mind that sometimes it’s impossible until later in the game.
Be careful what you sell
After the first few areas are cleared, it’s surprisingly easy for Tales of Arise to leave you flat broke. A stock of Life bottles, Orange Gels and the latest equipment can all hit your pockets pretty hard.
Tempting as it may be to sell your weapons, you are generally best only doing this as a last resort. Many new weapons will require previous weapons as their crafting materials – along with a few other bits and pieces.
The exact opposite is true of armour. As soon as a new, stronger armour is found, the previous one becomes completely obsolete and can be peddled immediately. This leads to one of the most basic and self-explantory Tales of Arise tips – sell your armour, but not your weapons.
Furthermore, ore collection points are scattered all over Dahna, and regenerate fairly regularly which makes it rather easy to amass a huge collection. As time goes on, better accessories will become available, and gaining the maximum benefit from these accessories is done via the enhancement function. Accessories are enhanced by using – you guessed it – spare ores.
This is why even low level ores should not be sold – the Gald gained from these is absolutely paltry, and your accessories will eventually need many ores in order to level up and unlock their full potential. Towards the end of the game, even a huge quantity can quickly whittle down as you craft your best equipment.
Don’t bother grinding
Tales of Arise has a somewhat peculiar scaling system where it’s very hard to overlevel. After you reach a certain level during a dungeon or exploration, your gained EXP will starkly drop.
In the space of literally one battle, you can go from earning massive EXP to virtually nothing. It’s a bit frustrating, but the most important thing is to be aware of it, since excessive grinding is an absolute waste of time.
You can still fight battles to level up your artes or gain some items, but when it comes to EXP you are far better off waiting until the next area, where the battles will be very slightly harder but the EXP gained will be enormously increased.

Use recipes to increase drop rates unless you are fighting a boss
General exploration doesn’t entail a massive challenge, so recipes offering bonuses to battle stats are not necessary. Once you’ve got to the next campfire unscathed, these ingredients are rather wasted since you probably didn’t need them. Instead, my rule of thumb was to always have a meal that increased ores or items whilst exploring, and switching to stat-based bonuses if a Gigant Zeugle or a boss was around the corner.
The bosses are telegraphed by the convenient pools of energy that heal your HP and CP, and you’ll sometimes even get a specific prompt that allows you to turn back. At these points, it may even be worth fast traveling out of the dungeon, cooking a new meal and returning. There is often an elevator, teleportation device or some other means of getting back to the boss quickly, so you can pick the best meal and ensure it’s still active when you reach them.
On a related note, you should also make sure to save before taking on any Gigant Zeugle. Tales of Arise is quite charitable when it comes to Game Overs and most bosses can simply be retried if you are defeated, but Gigant Zeugles encountered on the field don’t always provide the same luxury. We’ll end with the most obvious of our Tales of Arise tips – you should always make sure you save manually before taking on something marked on the map with one of those larger red icons.
Hopefully, these top Tales of Arise tips will help you liberate Dahna and complete the game. Check out some further advice below, along with our full spoiler-free review.
- RELATED: Tales of Arise review
- RELATED: Tales of Arise – How to max all relationships and bonds


