Nier Replicant ver 1. 22474487139 has a plethora of available weapons, ranging from swords, daggers, axes and spears. Many of these aren’t unlocked until later in the game and are split into three distinct categories: one-handed weapons, two-handed weapons, and spears.
The chances are you are searching for every weapon following the conclusion of Ending B, which drops the bombshell that you’ll need to collect them all to unlock the additional story content as well as Ending C, Ending D, and in turn Ending E. This is something you should do despite the time and effort involved. The additional three endings are most definitely worth the hassle.
Though NieR Replicant is nice enough to hint at how to get the endings, it doesn’t go as far as giving much guidance of where to find the weapons you need. In actual fact, there are 33 weapons you need to obtain. The game has a total of 34, but the final one is unlocked only after viewing Ending E and is not required.
Scroll through your inventory first and note which weapons you need. Chances are you may be missing Labyrinth’s Song and Labyrinth’s Shout, which require lengthy optional quests to obtain, along with a few others.
Here is a full guide of exactly where to find everything you need to unlock the final three endings.
Are any weapons missable?
Here’s the good news – no they aren’t. Every weapon you need is obtainable within the section of the game you will replay after watching Ending B and reloading your clear data.
Any weapons that are technically obtained from the first part of the game are either still available in the same spot, or available from shopkeepers.
Visit the weapon shops in the village, the Aerie, Façade and Seafront and most of them will be there – as detailed below.
List of weapons in order (to check inventory)
For starters, have a look at your inventory to see what’s there, and more importantly – what’s missing. This is the order they appear in your inventory, so the first step is to scroll through and take note of what you need. Everything you need to know to claim each one will follow afterwards in its own section.
One-Handed Weapons (down button)
- Nameless Blade
- Lily-Leaf Sword
- Nirvana Dagger
- Moonrise
- Rebirth
- Earth Wyrm’s Claw
- Blade of Treachery
- Beastbain
- Faith
- Ancient Overlord
- Phoenix Dagger
- Labyrinth’s Whisper
- Fool’s Embrace
- Iron Pipe
Two-Handed Weapons (left button)
- Kusanagi
- Axe of Beheading
- Fang of the Twins
- Vile Axe
- Beastlord
- Iron Will
- Phoenix Sword
- Labyrinth’s Song
- Fool’s Lament
Spears (right button)
- Transcience
- Spear of the Usurper
- The Devil Queen
- Sunrise
- Beastcurse
- Captain’s Holy Spear
- Dragoon Lance
- Phoenix Spear
- Labyrinth’s Shout
- Fool’s Accord
Story weapons
These are all mandatory and cannot be missed. For completeness, we’ll include them all anyway along with the point you obtain them.
Nameless Blade
Type: One-Handed Weapon
This is the default weapon that is in your inventory when you start the game.
Moonrise
Type: One-Handed Weapon
This is obtained for rescuing the man from shades on the Southern Plains early in the game on the way to Seafront.
Rebirth
Type: One-Handed Weapon
The Prince of Facade provides you with this weapon after the Barren Temple is cleared for the first time.
Kusanagi
Type: Two-Handed Weapon
Another weapon automatically added to your inventory, this time when you start the second part of the game.
Transience
Type: Spear
Also given automatically when the second part of the game commences.
Iron Will
Type: Two-Handed Weapon
Gideon from the Junk Yard will give this after you have gone through the Junk Yard in part 2 and obtained a Memory Alloy.
Ancient Overlord
Type: One-Handed Weapon
Given by the King of Facade during Part 2 of the story, in the segment where the wolves are battled.
Iron Pipe
Type: One-Handed Weapon
This is obtainable by completing a side-quest called “The Magical Stone” but if you do not complete the quest, you will automatically be given it after viewing Ending B. As such, there is no way you can miss it when you are aiming for Endings C, D and E. The quest itself is one of the better ones, so I’d still encourage you to complete it.
Weapons found in crates
By smashing every crate in sight, you won’t go too far wrong here. However, there are a couple that can easily be missed if you take your eye off the ball.

Nirvana Dagger
Type: One-Handed Sword
Found in the Lost Shrine on the second floor. This is just after climbing up the first of two ladders, in a crate on the wooden bridge. It’s almost impossible to miss since the crate is right in your way.
Blade of Treachery
Type: One-Handed Sword
Found in Emil’s Mansion, in a chest just before the boss and the save point. Again, it’s right in your way and very hard to miss.
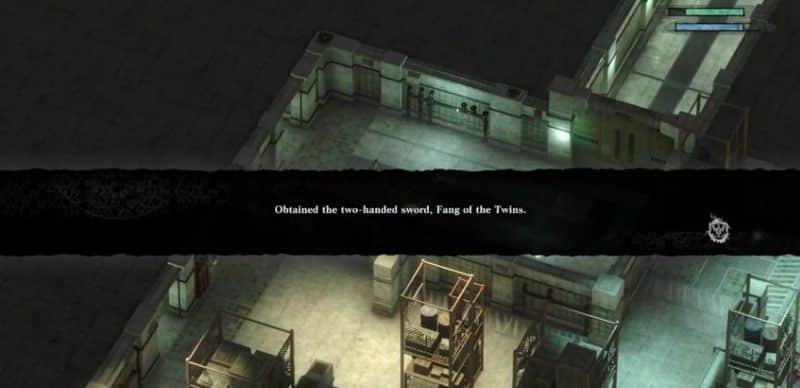
Fang of the Twins
Type: Two-Handed Weapon
Found in Emil’s Mansion in Part 2. When you are in the research laboratory, this is in a crate just before the SA key card is used and just after you go through the secret side corridor. Since the camera isn’t always your friend in this section, it’s slightly easier to miss.
Devil Queen
Type: Spear
Found on the way to the Lost Shrine in Part 2 – this is in a crate just before one of the long ladders in the outer path leading to the Lost Shrine’s back entrance.
Beastlord
Type: Two-Handed Weapon
Found at the Lost Shrine in Part 2. This is on the roof, right before the boss. It’s in a crate on the other side of the door to the save point.
Beastcurse
Type: Spear
Found in the Junk Heap in Part 2. Another weapon that’s right before a boss, in a crate near the hole that you jump down to confront him. It’s in the same room as the save point.
Phoenix Sword
Type: Two-Handed Weapon
Found in the Shadowlord’s castle, just after the point of no return in the room with the doves. I missed this the first time – it’s in one of the crates on the left hand side by the door to the next area.
Dragoon Lance
Type: Spear
Found in the Shadowlord’s castle in a crate before you climb the spiral staircase, just after you beat the giant boar shade and escape for the first time.

Weapons bought in shops
Many weapons can purchased from the handful of weapon shops, but they don’t come cheap. Here are the shops and prices for each weapon.
Lily-Leaf Sword
Type: One-Handed Weapon
Sold at the weapon shop in your village for 2,400 gold.
Beastbain
Type: One-Handed Weapon
Sold at the weapon shops of either your village or Seafront for 16,800 gold.
Earth Wyrm’s Claw
Type: One-Handed Weapon
Sold at the weapon shop in Facade for 8,400 gold.
Axe of Beheading
Type: Two-Handed Weapon
Sold at the weapon shop in your village for 19,200 gold in Part 2 only.
Sunrise
Type: Spear
Sold at the weapon shop in your village or the Aerie for 21,600 gold in Part 2 only
Vile Axe
Type: Two-Handed Weapon
Sold at the weapon shop at Seafront for 21,600 gold in Part 2 only.
Spear of the Usurper
Type: Spear
Sold at the weapon shop in Seafront for 19,200 gold in Part 2 only.
Phoenix Dagger
Type: One-Handed Weapon
Sold at the weapon shop in Seafront for 36,200 gold in Part 2 only.
Faith (purchase)
Type: One-Handed Weapon
This can be obtained by saving all of the villagers from their dreams in the Forest of Myth in part 1. If you miss it, thankfully you can purchase it from the weapon shop in the Aerie for 18,000 gold in Part 2.
Captain’s Holy Spear
Type: Spear
Sold at the weapon shop in Facade for 30,000 gold in Part 2 only.
Phoenix Spear
Type: Spear
Sold at the weapon shop in Facade for 37,400 gold in Part 2 only.
Weapons obtained by quests
These are by far the most troublesome weapons, which take the longest to obtain. However, everything you need to know is right here.
Faith (quest)
Type: One-Handed Weapon
As mentioned above, this can be obtained by saving all villagers in the Forest of Myth in Part 1 but if you miss it you can purchase it from the weapon shop in the Aerie for 18,000 in Part 2. If you have already reached the credits without getting it, your only option will be to purchase it from the Aerie.
It’s only mandatory to save the mayor, so if you speak to the other villagers afterwards you can enter their dreams and save them from the Deathdream. Once you have done so, speak to the mayor again who will reward you with Faith. Beware – if you enter their dreams and pick the wrong options, you can end up with a game over.
For the villager at the far north of the map, choose the following options in this order:
- …and proceed North
- …and proceed East
- …and proceed North
- …and proceed East
- …and proceed North
For the other villager (directly opposite him, but more towards the south), choose the following option:
- The real one is Beta
Labyrinth’s Whisper
Type: One-Handed Weapon
This is obtained by completing the sidequest “A Bridge in Peril”, which is given by a guard wandering around near the Northern Gate in your village (not one of the guards standing by the gate). It’s available from the point you travel to the Lost Shrine to get the first key fragment. This is one of the simpler ones, but can still be a pain if the weather does not land in your favour:
- Go to the wooden bridge on the Northern Plains during cloudy weather
- There is a huge shade that will appear – note that he will not appear in any other weather. You can change the weather by going to the Aerie or the Forest of Myth, and then returning to the Northern Plains. Entering and exiting the village will NOT change the weather
- He has quite a lot of health but isn’t too difficult. If you’re struggling, I found it easiest by charging up Dark Shield (ie, so the circular shield completely surrounds you) and just hacking away, refreshing the spell every so often
- Upon beating him, head back to collect your reward, which is the Labyrinth’s Whisper and 30,000 gold which is also handy given how expensive the other weapons are!
Labyrinth’s Shout
Type: Spear
This is obtained by completing the sidequest “The Damaged Map”, which is available in Part 2 from any point after your clear data commences. This is a painfully long-winded quest that’ll send you just about everywhere. Brace yourself for some backtracking and follow these instructions:
- Speak the blacksmith in your village and accept the quest
- Head to the library. On the upper level, there’s a point you can examine to find a damaged treasure map
- Take the map to the Strange Thing shop in Façade, who can repair it with 3 Machine Oils, 3 Eggplants and 3 Goat Hides. Check your inventory to see what you need, and then go after the ones you don’t have:
- Eggplants can be bought from the grocery store in your village
- Goat Hides can be found in the Eastern Planes – these are easy to find, just slay a bunch of goats and examine their bodies until you have three hides (something they drop meat instead)
- Machine Oils are dropped by the flying robots in the Junk Heap. These are very rare, so I would suggest equipping words that boost your item drop rate first. The best place to farm these is in the room just before the ‘Depths’. Rush through B2, skipping everything until you get there. Defeat them all, leave the room and go to the Depths, before returning time and time again until you get enough Machine Oils. These flying enemies appear elsewhere, but this is the room where the largest number of them spawn together in one go
- One you have the materials, head back to the Strange Thing shop and you’ll have the map repaired
- Go back to the weapon shop, but this time you’ll have to speak to the blacksmith’s wife who asks you to find the treasure yourself!
- Speak to Popola who will partially decipher the map

- Go to the Lost Shrine and find some junk on the second floor. After climbing the stairs and progressing through the first set of rooms, you’ll end up back out in the open. Head to the rooms that lead to a dead end, rather than the longer set of rooms that lead towards the ladder upstairs. A pile of junk awaits.
- Return to the Blacksmith’s wife, who will trade you this for a hair ornament
- Head to the Strange Thing store again, and receive a Gold coin in place of the ornament
- Go back to the blacksmith, who will gleefully take the Gold Coin and give you another map (yawn)
- Speak to Popola who will again partially decipher the map, leaving you a clue that there’s a treasure in the Northern Plains by a bridge
- Finally go over the small wooden bridge towards the Forest of Myth and the Aerie. On the right-hand side, in the water beneath the cut-off starting part of the bridge is a spot you can now examine – this is the Labyrinth’s Shout, at last!
Labyrinth’s Song
Type: Two-Handed Weapon
This is obtained by completing the sidequest “Disturbing the Sleep of Kings”, however you will also need to complete the sidequest “A Shade Entombed” before this is actually available.
Both quests require the Royal Compass item, but this is simple enough to get if you don’t already have it. Speak to the guard on the right hand side of the door to the King’s mansion, and he’ll give it to you. This enables you to walk through the sandstorm and reach the Barren Temple again.
Firstly, A Shade Entombed:
- After obtaining the Cerberus key fragment, speak to the guard on the right hand side of Facade’s entrance and accept the quest
- Head towards the Barren Temple, and a bandit will alert you of some dangerous shades inside
- You only actually need to beat the shades in the long room before the bridge, through the door on the right hand side
- However, you will eventually have to beat all of the shades in the temple in the next quest so you should enter every room just like you did in Part 1 of the story
- Each room will have a restriction on one or more controls, but this is far less annoying than it was the first time around as you only need to beat the shades
- Once you have beaten the boss shade, leave the temple and you’ll have a brief fight with the bandit
- After doing this, you’ll complete the quest and receive 20,000 gold
Once this quest is complete, “Disturbing the Sleep of Kings” will be available – which will lead to the next weapon.
- Speak to the King of Façade who is standing on the roof of his home, and accept the quest
- Head back to the Barren Temple
- If you didn’t clear all of the rooms during “A Shade Entombed”, then you’ll have to tackle these one by one. Each room has a bunch of shades and some restrictions on the controls you can use (eg, unable to use magic, or dodge)
- If you defeated all the available shades during the previous quest, the rooms will be empty and there will only be one more set to defeat this time – they’re on the bridge in the north area of the map
- After beating these, go into the door at the end of the bridge where you fought the boss in Part 1 – there’s another boss-like shade to beat here
- Once you’ve triumphed, which isn’t overly difficult, head back and finally receive the Labyrinth’s Song from the King of Facade
Secret Weapons
These are a little more unconventional, and there are four to obtain. The final one isn’t actually available until Ending E is viewed so there is no chance you’ll get this accidentally. However, you don’t need this final weapon and you should only obtain the three “Fool’s” weapons.
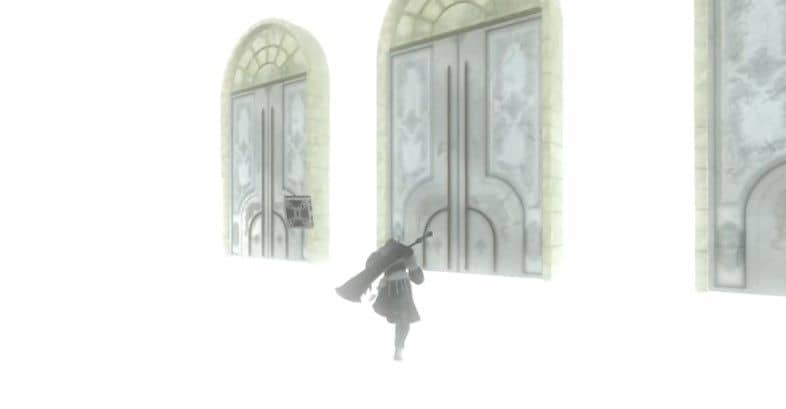
They are all available by reading the diary in the ground floor of your house. This transports you into a white area with a door leading to a gauntlet of battles. Clear every battle until you are returned to the white area, which will reward you with a weapon and unlock the next door. Every time you are returned to the white area, you can leave to save your game and return from where you left off.
Fool’s Embrace
Type: One-handed Weapon
Beat all of the enemies behind the first door.
Fool’s Lament
Type: Two-Handed Weapon
Beat all of the enemies behind the second door.
As a sidenote, this is the most powerful weapon in the game once it is fully upgraded. I much prefer spears myself though.
Fool’s Accord
Type: Spear
Beat all of the enemies behind the third and final door.
The game recommends you are at level 33 before you take this on. Personally I managed to beat it on around level 29. However, the final area is pretty tough and you need to be careful and ideally be stocked up with healing items.
Kaine’s Sword
Type: One-handed Weapon
This is not available until Ending E is viewed, so you don’t need it. After so much replaying already you’re probably not exactly chomping at the bit, but if you feel so obliged head to Kainé’s house just in front of the Aerie to snag the final weapon.

How do I get the remaining Endings? (spoiler-free)
Without spoiling anything, it’ll be fairly straightforward from here as the weapons are the most troublesome aspect. There is full spoiler-free guide to all endings below.
However, in its simplest form you’ll need to do the following once you have got all 33 required weapons in your inventory:
- Beat the final boss again, which will now unlock an additional segment at the end
- You are then presented with a choice – one leads to Ending C, and the other leads to Ending D. If you view Ending C, make sure you save your clear data in a different slot before replaying from the previous slot and choosing the other option
- Once you have seen Ending D, you will be required to delete your save file (!) and start a new game with a different character name
- Play through the early parts of the game from the very beginning, and once you have beaten the giant shade in the Aerie alongside Kainé (which takes about two hours if you rush through it quickly), the story will branch off in a different direction that leads to Ending E
- Note: You don’t actually need to view Ending C to unlock Ending D or Ending E
Conclusion
It’s a pretty long and tiresome road to collect all of the weapons – particularly the Damaged Map quest.
Thankfully, there are only a few quests to complete and most of the weapons will already be in your inventory, provided you were breaking crates every time they crossed your path.
When this arduous task is completed, the remaining three endings are within your grasp. Enjoy.